Tips for Anyone Who Wants to Simplify:
- Start with a Vision of the life you want to embrace. What could you gain? What will there be room to do now? Let your mind imagine the possibilities, dream be positive, then write it down. Refer to your vision often, especially when the going gets bumpy. [NOTE: If RightSizing for a move – Start Early, you’ll need time to decide. The shorter the notice, the more stressful and difficult.] Get a notebook, with pockets, collect your information, thoughts and ideas, for easy reference.
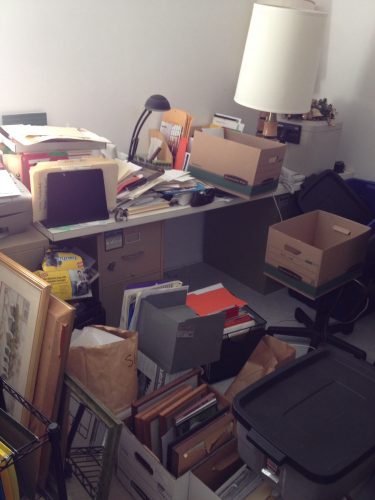
- Small Steps to Start. Pick one-two-hour project, a paper-stacked desk, a giant pile of stuffed animals, the ever-present “junk drawer.” You’ll get a quick win and become familiar with the process of sorting and tossing. Don’t spend a lot of time deciding.
- Strategize. Map large projects out, on paper. In the “old place” you had a big desk – now, what will you do at the desk. What files do you really need now. Hobbies or volunteer work may take up more space now than they once did, so what will the trade off be?
- Slice it. As you begin, think in terms of percentages. What percentage of your clothes can you keep? 3000 square feet has less closet space than 1100. Do you still have to have 10 business suits or 20 pairs of pumps? Using masking tape, mark out the size of the new closet or consider the size of the living room you may be going to and mark that off. Now, you’ll have a clearer idea of what will fit in THAT space.
- Score the Stuff. On a scale of 1 to 10 ask these questions for each item. Love it? Use it? Space it takes? Condition/$$Value, Sentimental value? For example, consider collections (say angels), and it’s Love it?/10, but you plan to store except at Christmas – that’s a 2/for use it, Sentimental/is it all really a 9? Couldn’t you dole out some for each child and box for them to use now?
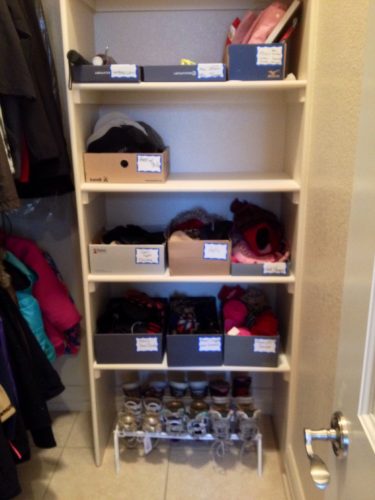
- SORT LABEL. SORT LABEL! Putting like items with like. When you have ALL the office supplies together, it’s easier to see what you really need to keep. Make good use of sticky notes, denoting what it is, where the items will go (i.e., guest/linens, hold for charity, Kitchen/pots). Don’t keep things that are cracked, worn or don’t work (i.e. that chair you’ve been meaning to fix/paint for 7 years). Remember, whatever you keep will go to an assigned, specific room it will live.
- Showcase it or Sow it. REMEMBER with some items, it’s the memory that’s precious not the thing itself. Creating a showcase that honors the memory, or the person who gave it, instead of keeping the vase itself, that Aunt Jane gave you for your wedding, will mean more and take up less space. If it’s buried, it isn’t a treasure!
- Share the Process, Share the Stories. “A burden shared is lessened and joy shared is doubled” is especially true now. Respecting the emotional need to share stories that will come to mind in this process, is good for everyone — just as telling the story behind a funny old statue can suddenly give it meaning, that item that you think trivial, can have a special memory for your children, that you never considered.
- Remember – It’s not about how much stuff you keep, but about the those special objects, from critical periods of the past, imbued with the values that will help you make the most of the new life you’re about to begin – that’s Rightsizing & the UPside to downsizing!™
Your Photo History
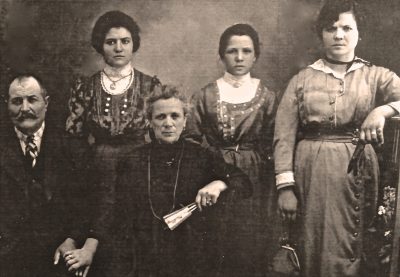
I often hear, “What about my pictures?!” “What should we do with them all – I have 35 Albums!” “I have a big box of Mother’s photos, I don’t know most of the people in them, but feel bad just tossing them.” That was a tough one for me too. In thinking it through, I here’s my advice:
- Get a project-partner, a friend, a husband, a family member, (a professional organizer), Mom herself, if possible. When you have someone there as you go through the photos and memorabilia, you get a second set of eyes in recognizing faces, in assigning the decade and in writing notes. This process will get you remembering and talking about family events, or stories you’ve been told, or observations about people. Write them down!
- Get the photos, yours or Mom’s in order as best you can by decade. So, if Mom was 80, you’ll have eight stacks.
- As you go through the pictures, you’ll recognize people, add names whenever you can.
- If a stack gets really large (i.e. Dad’s photography phase) then add other dividers. Mom/Dad in their 40’s, at parties, on vacation, holidays. Categories that make sense to you and your family’s interests.
- At this point you could make dividers and put everything in nice boxes, shelved in your family room and quit. (Well you could). OR you could Scan them. If you plan on doing it yourself start with a few at a time, maybe one decade. There are also lots of companies that will do this for you. They do not, however, add your notes. I can tell you from experience, it there is no name, no note on the event, they are not much more than a curiosity.
- After they are scanned you create a story. You don’t need to be Charles Dickens, just think in the old journalist terms. Who, What, Where, When, How and Why. So — there are lots of pictures of Mom in an apron, then write a few words about her cooking, when and for who she cooked fancy — her crazy aprons — her Patton-like attitude in the kitchen.
- Don’t leave Your Family with a box of no-name-no-place photos. Create a Photo/Memories Clean-up Day, like New Year’s Day, or the First Sunday in January (January IS National Organizing Month), to go through the photos, even if they are on computer. Come to think of it, digitized photos might make it even more essential.
- Compile photos to create a video. Is it an Academy Award winner? No-(nominee maybe?). You will however glad you did.

